
INTRODUCTION:
Before using your Aphelion, please read this manual noting the sections on safety and maintenance in particular. This manual is a guide to assist you and is not a comprehensive guide to cycling or bicycle maintenance. Please consult a qualified mechanic if you are unable to assemble, repair or maintain your Aphelion yourself.
CONTENTS:
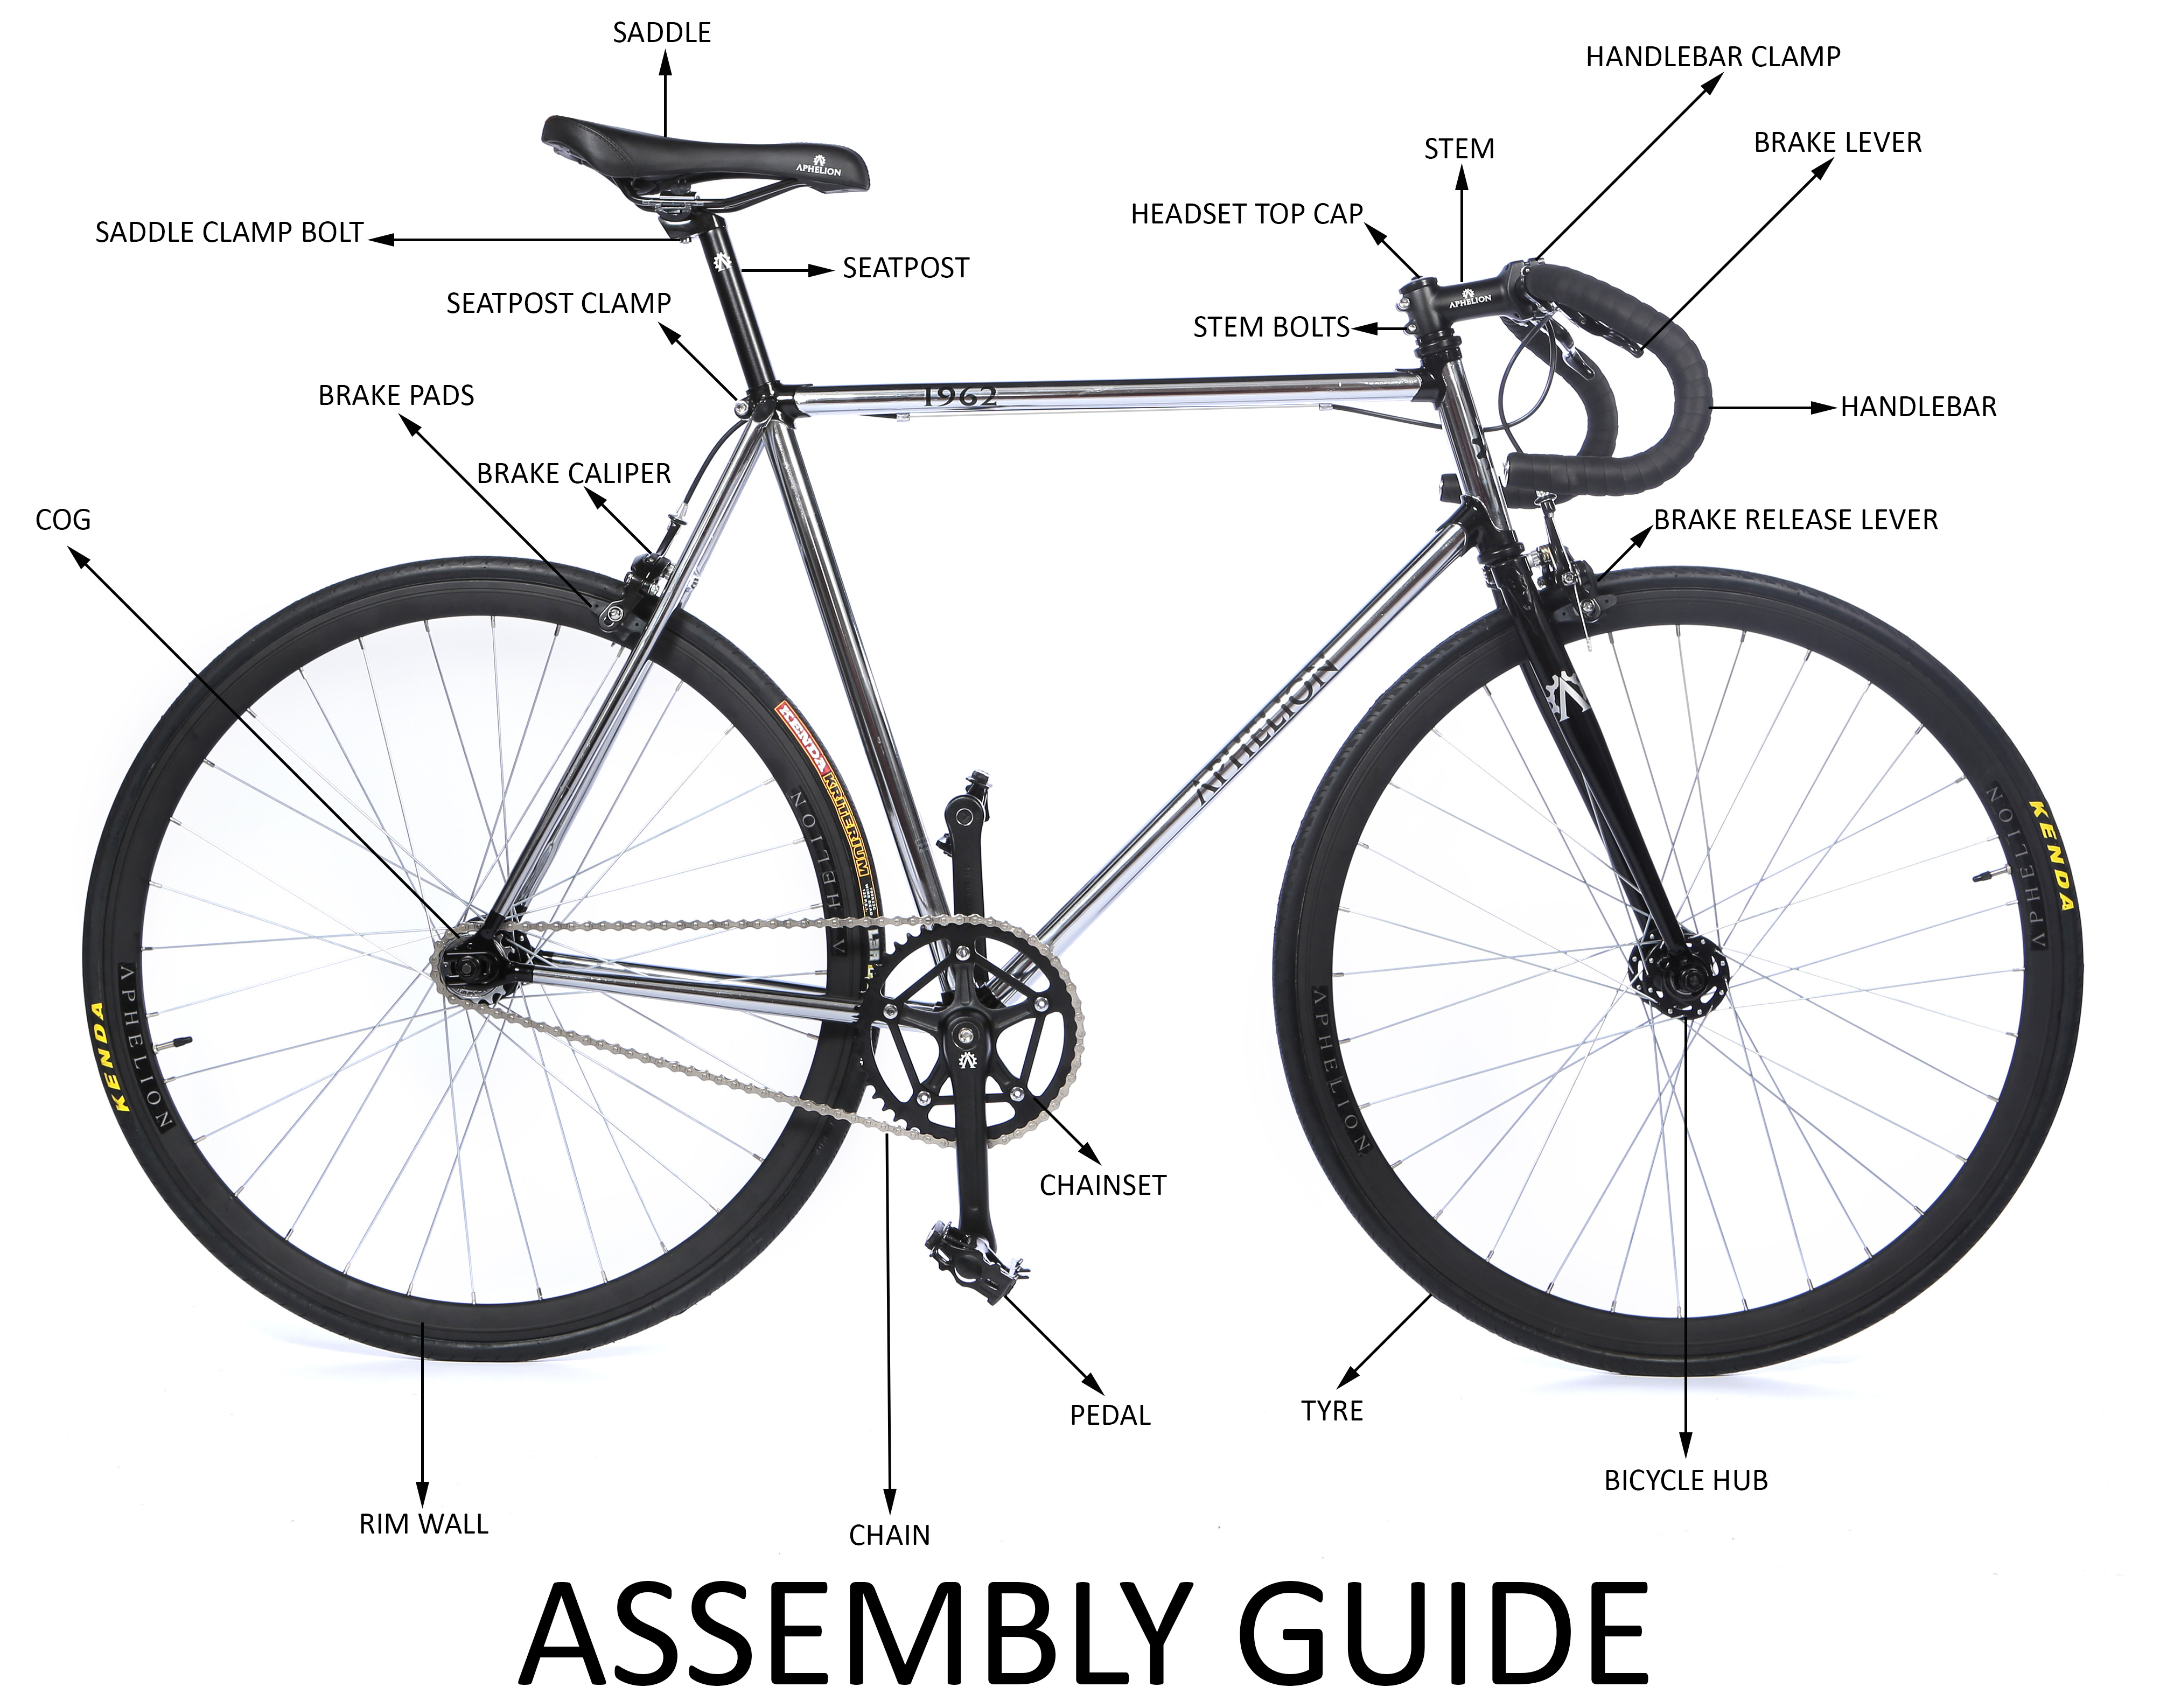
• APHELION DIAGRAM
• SAFETY
• ASSEMBLY
• MAINTENANCE
SAFETY:
WARNING
The APHELION bicycle is designed for use on roads and well maintain
paths. We strongly advise against off road riding, cross country,
extreme sports, performing stunts or any other excessive bicycle riding
as this would apply high stress on the bicycle frame/components and can
lead to serious injury.
The rider’s maximum weight including luggage should not exceed 120kg
BEFORE EACH RIDE:
• We recommend the use of approved cycling helmets, even in countries where use is not mandatory.
• When riding in the dark, use lights and wear reflective clothing.
• Riders must comply with all road laws for their country.
• Check and ensure that the tyres are inflated to the recommended
pressure displayed on the side wall (Please refer to maintenance on page
11)
• Check that the rim/braking surface is free from any grease or dirt as this can greatly reduce braking performance.
• Check that both front and rear brakes are fully functioning. (Left
brake operates rear wheel/Right brake operates front wheel)
• Check both wheels ensuring that they are straight and secured.
SINGLE SPEED/FIXED GEAR:
For riders who have never ridden fixed gear, it is advisable that you
practice and familiarise yourself with the functionality aspect of the
fixed gear before riding in traffic/busy roads. Fixed gear cog is
directly tied to the motion of the pedals.
Single speed free cog is also available and can be easy switched around following the instructions on page 5.
ASSEMBLY:
All Aphelion bicycles are fully assembled and adjusted by qualified technicians however, for safety and packaging purposes, bicycles are supplied 85% constructed and will require some assembly.
If you are not confident in carrying out the tasks bellow, we would advise that you have a qualified mechanic assemble the bicycle on your behalf.
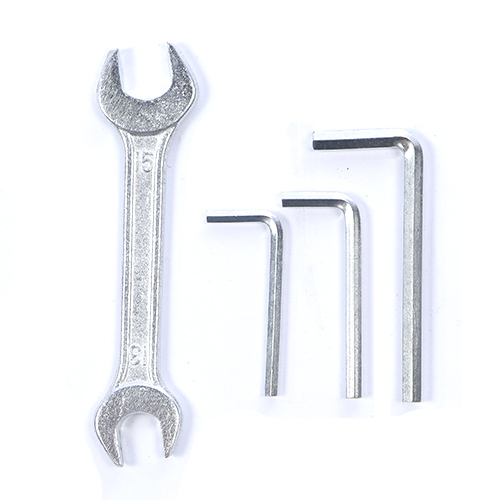
TOOLS PROVIDED:
WHEELSET
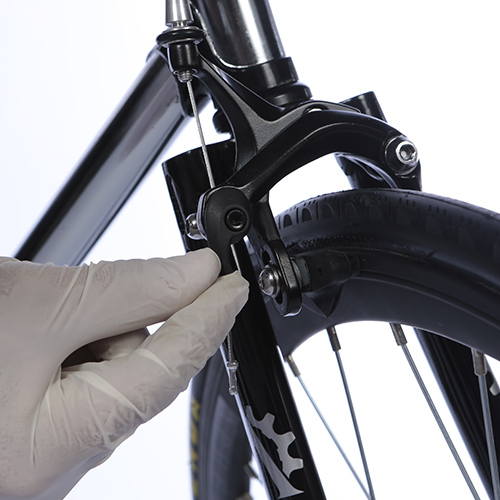
FRONT WHEEL
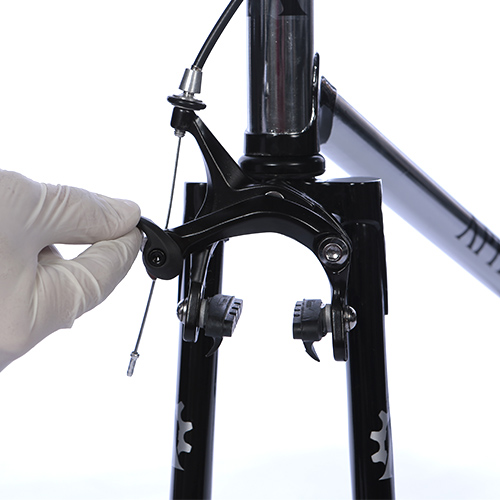
Open the brake caliper by releasing the lever. (This will allow enough clearance for the tyre to pass through the brake pads.)
Mount the front wheel by sliding the axle through the fork drop outs making sure that the wheelset is aligned.
Manually fasten both lock nuts by hand before using the spanner provided to secure the wheelset in place.
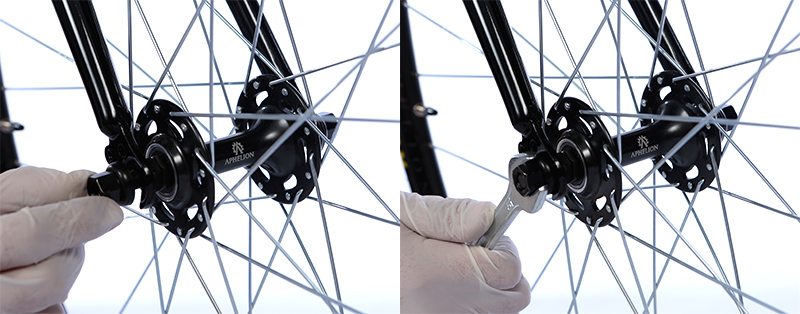
The correct torque for wheelset nuts is 30-40Nm
REAR WHEEL
When assembling the rear wheel, it is important to set the correct chain
tension before tightening both wheel lock nuts. Choose from free or
fixed cog before placing the wheel in the dropouts.
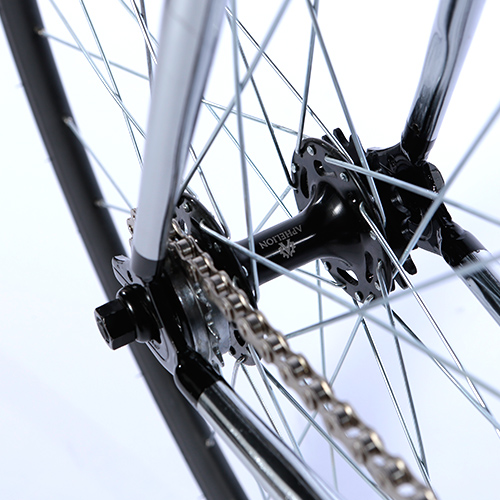
The chain should have a little slack. Not enough slack for the chain to slip off when riding and not excessively tight as this can shorten the lifespan and cause unnecessary wear/stress to the bottom bracket and rear hub. Adjust the chain tensioner accordingly and centre the wheelset then tighten both buts securing the wheel to the frame.
Reclose both brake caliper release levers and check that the brake pads meet the braking surface.
HANDLEBARS
Handlebars are clamped to the stem using four bolts.
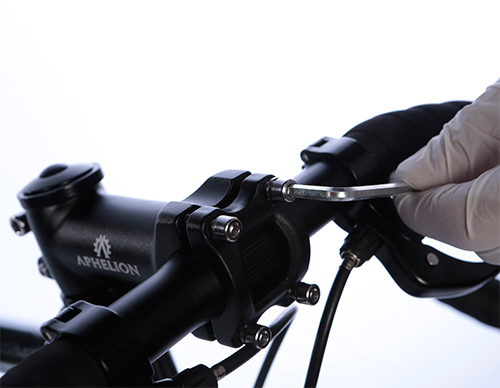
Make sure the handlebars are centred in the stem clamp ensuring that the cables are in the correct position and not tangled.
Screw all four bolts but do not tighten. Check that the handlebars are
aligned before retightening each bolt taking care that the handlebars
remain in position.
STEM
Loosen the clamp bolts located on stem using a hex key.
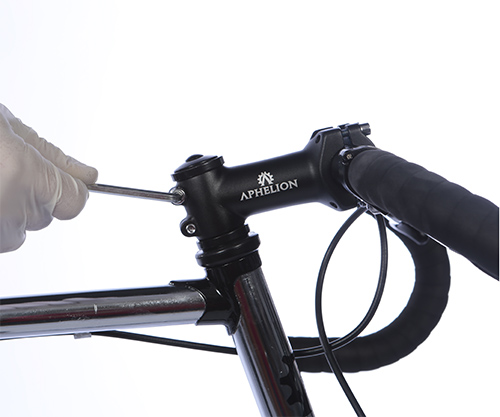
Remove the top compressor cap and slide the stem off the steerer tube.
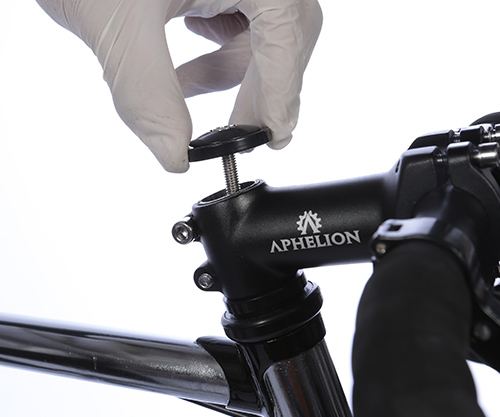
Adjust the stem height by adding or removing spacers.

When re-assembling the stem, take extra care installing the top compressor cap back onto the stem. This acts as a compressor preloading the headset bearings. Tightening the bolt too tight can restrict movement and too loose can cause rattling through the forks which could lead to serious damage and injury.
Tighten the top compressor cap making sure not to over tighten (stem bolts must be loose when tightening the compressor cap)
Align the stem using the top tube and the front wheel as a guide before tightening the stem bolts.
SADDLE/SEATPOST
Insert seat post into the seat tube to the desired saddle height.
Tighten the seat clamp bolt using the spanner and hex key provided
ensuring that the saddle is aligned.
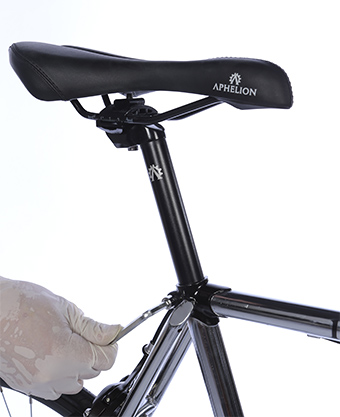
Never ride your Aphelion cycle with the minimum mark of the seat post being visible.
PEDALS
Pedals will have markings on the axles. “R” for right and “L” for left.
The right pedal thread will screw into the chain set by rotating the
axle clockwise. The left pedal will screw into the crank arm anti
clockwise.
Before mounting the pedals, it is advisable to apply little grease to the threads before screwing in the pedals.
To ensure proper placement, manually screw the pedal into the chainset by hand before tightening with tools. Some pedals may require different tools which will usually vary from a hex key or spanner.
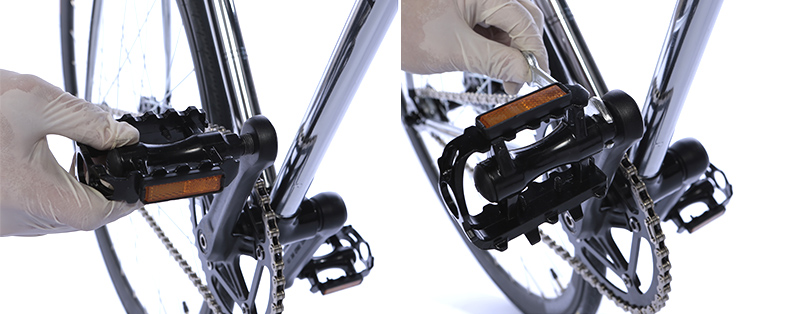
WARNING! After your first ride, check the fit of the
pedal as these can sometimes come loose which could destroy the thread
and lead to serious injury.
MAINTENANCE:
All parts are subject to wear and tear from normal use.
To prevent injury to yourself and avoid any irreversible damage to your
Aphelion, it is advisable to address any issues that may deem the
bicycle unsafe to ride or affect the functionality of the bicycle in
anyway as soon as possible.
• NUTS & BOLTS: Ensure that all bolts and nuts
are secured and tightened. The correct torque for crank bolts and wheel
nuts is 28-32Nm.
• SPOKES: Check for any damaged spokes. (Damaged or loose spokes can cause the wheel to run unevenly)
• BRAKE PADS: We recommend replacing brake pads if they are worn pass their limit.
• BRAKE CABLES: Replace if they are damaged or frayed.
• BRAKE CABLE TENSION: As brake pads wear due to use, the brake lever
tension will have added slack. This can be adjusted by opening the
barrel adjuster located on the brake caliper and brake lever.
• CHAIN: For optimal performance, chain should always be clean and lubricated.
• TYRES: Check that the tyres still have tread. Replace tyres if they
have been flat spotted caused by harsh braking/skidding of the wheels.
This will cause the wheel to roll unevenly.
Tyre pressure is important for both comfort and safety. Keeping your tyres well-inflated is highly recommended.
The correct tyre pressure should be printed on the side wall of each tyre.
The recommend tyre pressure for tyres supplied on Aphelion Cycles.
(Front & rear) Min (psi) 80 - Max (psi) 125